All the way back in May, I was pondering the collision of modern media and the organic process of artistic creation. In that post I wrote:
Behind the cut below is a vintage video which discusses a related topic: that how classic art is viewed today is so radically different from how it was when those works were created. One of my favorite quotes:
Which made me think about different pieces of dance performance art, and how for me it is ideally a reflection of the dancer's (or dancers') "interior life". And that sometimes, that context is so integral to fully appreciating the performance, yet we don't often have that piece of the puzzle. We are viewing it and assessing it "in the context of (our) own life", as an audience, by the familiarity of the room we are in and the people around us, no less! How much of the backstory is necessary to make a concept piece really effective for our audience, and how much is it lost if we just put it out there without our audience having any perspective on the creative roots from which the concept has sprung? When they go "huh", is it the audience's lack of vision or personal context, or did we fail as performers to make our intent and creative vision clear? And even further, how much does venue play a part of such a performance?
Is this part of the key in the proliferation of poor fusion out there? Lack of context? My very rambling stream of consciousness behind the cut...
 Is it the crux of the problem that new and blossoming dancers are viewing fusion of another artist--a fusion which sprung from that artist's personal context, which the viewers are not privy to in any detail--and then parroting that style or creative choice without any personal context?
And then we have to ask, is it a failure of the performer to really access and present a honest "interior life" (rather than a contrived or copied one) in the work?
Or is there simply a lack of an understanding, on the part the audience, of an expression which is coming truly from within the dancer on stage?
Certainly the latter seems to be the cry of the struggling artist. I find that most often when dancers are challenged on their artistic choices, the volley back is "You just don't get it!" Soon followed by "I will do whatever I WANT. I am an ARTIST!!" The insinuation is that it is entirely on us, the viewer, to do the work of understanding and appreciating, and none of that rests on the performer themselves. That their job is only to do whatever they feel, whatever they think makes sense in the context of their life (even if it is sometimes a completely superficial copy of someone else's choices) without consideration of their audience. But I would argue that we are not just visual artists as dancers; that as performers, we are also necessarily entertainers. And while part of our job is an internal struggle to create something genuine from within ourselves, the other part is translating it into something for others to consume. If your work is truly from within you, and you want to put it out there for others to share in, the next step is to consider how you will best convey your message so others can appreciate it.
So following this train of thought, I ponder many questions...
How much of copying another's style is a stepping stone to a more personal expression, and how much of it is a crutch to avoid the real work of personal development?
How much of the responsibility to make any performance piece understood is in the hands of the performer versus the eye of the beholder? And what role to we performers have in helping the latter along? Is it creative sacrifice or creative consideration to change our original vision in any way to be more palatable to our audience?
"A sculpture or a painting--even a piece of music or a video--is not expected to change, and is appreciated for its unchanging beauty. It is it's solidity that is part of its appeal, in a way. We see the same piece over time, and instead of expecting it to change or adapt to us, our perspective adapts and changes. We see it (hear it, experience it) from different angles, in different lights, in a different environment, our attitudes change, our perceptions change; and we find that our appreciation deepens and becomes richer and more multi-faceted as we take the time to consider the piece from all these perspectives. The work to appreciate that art day-to-day is in our hands as the viewer."
Behind the cut below is a vintage video which discusses a related topic: that how classic art is viewed today is so radically different from how it was when those works were created. One of my favorite quotes:
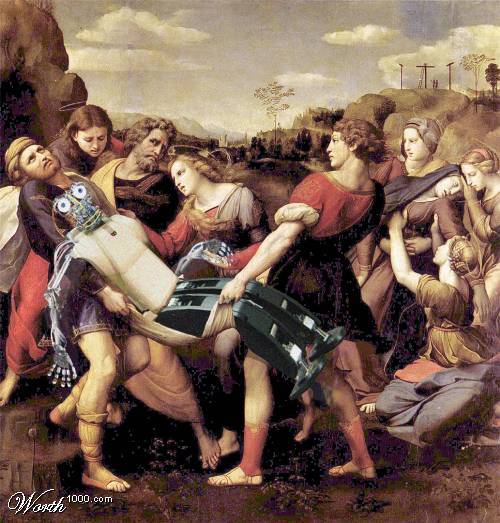
"As you look at (the art) now, on your screen, your wallpaper is around them, your window is opposite them, your carpet is below them. At this same moment, they are on many other screens, surrounded by different objects, different colors, different sounds. You are seeing them in the context of your own life. They are surrounded not by gilt frames, but by the familiarity of the room you are in and the people around you.
Originally paintings were an integral part of the building for which they were designed. Sometimes when you go into a Renaissance church or chapel, you have the feeling that the images on the wall are records of the building's interior life. Together they make up the building's memory, so much are they are part of the life and individuality of the building. Everything around the image is part of its meaning. Its uniqueness is part of the uniqueness of the single place where it is. Everything around it confirms and consolidates its meaning."

Which made me think about different pieces of dance performance art, and how for me it is ideally a reflection of the dancer's (or dancers') "interior life". And that sometimes, that context is so integral to fully appreciating the performance, yet we don't often have that piece of the puzzle. We are viewing it and assessing it "in the context of (our) own life", as an audience, by the familiarity of the room we are in and the people around us, no less! How much of the backstory is necessary to make a concept piece really effective for our audience, and how much is it lost if we just put it out there without our audience having any perspective on the creative roots from which the concept has sprung? When they go "huh", is it the audience's lack of vision or personal context, or did we fail as performers to make our intent and creative vision clear? And even further, how much does venue play a part of such a performance?
Is this part of the key in the proliferation of poor fusion out there? Lack of context? My very rambling stream of consciousness behind the cut...
 Is it the crux of the problem that new and blossoming dancers are viewing fusion of another artist--a fusion which sprung from that artist's personal context, which the viewers are not privy to in any detail--and then parroting that style or creative choice without any personal context?
And then we have to ask, is it a failure of the performer to really access and present a honest "interior life" (rather than a contrived or copied one) in the work?
Or is there simply a lack of an understanding, on the part the audience, of an expression which is coming truly from within the dancer on stage?
Certainly the latter seems to be the cry of the struggling artist. I find that most often when dancers are challenged on their artistic choices, the volley back is "You just don't get it!" Soon followed by "I will do whatever I WANT. I am an ARTIST!!" The insinuation is that it is entirely on us, the viewer, to do the work of understanding and appreciating, and none of that rests on the performer themselves. That their job is only to do whatever they feel, whatever they think makes sense in the context of their life (even if it is sometimes a completely superficial copy of someone else's choices) without consideration of their audience. But I would argue that we are not just visual artists as dancers; that as performers, we are also necessarily entertainers. And while part of our job is an internal struggle to create something genuine from within ourselves, the other part is translating it into something for others to consume. If your work is truly from within you, and you want to put it out there for others to share in, the next step is to consider how you will best convey your message so others can appreciate it.
So following this train of thought, I ponder many questions...
How much of copying another's style is a stepping stone to a more personal expression, and how much of it is a crutch to avoid the real work of personal development?
How much of the responsibility to make any performance piece understood is in the hands of the performer versus the eye of the beholder? And what role to we performers have in helping the latter along? Is it creative sacrifice or creative consideration to change our original vision in any way to be more palatable to our audience?