Showing posts with label cooking. Show all posts

Dutch Oven Whey Boule Using Poolish

by Monday, September 12, 2022


First, the recipe as originally written, from this PDF. I have transcribed it at the end of this post, in case the link ever dies.

What I Actually Did

Overnight poolish (ingredients for one)

  • 250g all purpose flour
  • 250g cool whey (straight from the fridge)
  • 1g Active Dry Yeast

Remaining ingredients 

  • 240g bread flour 
  • 30g hard white wheat flour (stone ground) 
  • 8g salt 
  • 6g Active Dry Yeast 
  • 125g warm whey (microwaved until warm to the touch)
  • 50g honey 
  • 50g butter, softened 

Let poolish rest under cling wrap in a bowl for 14+ hours up to 24 hours. Warm whey in microwave at half power until warm to the touch, not hot. Add honey and yeast and stir to incorporate. Let rest 10 minutes. Measure out other flours and ingredients into large tub so there is room for the rise. Add softened butter to melt in warm whey/yeast mix. Incorporate whey mix and poolish gently into the flour and salt in the tub. Mix and squish until dry ingredients incorporated well. Does not need to be perfect, will be pretty shaggy and sticky. Using water on your hand helps, but still this stuff sticks. 

Cover and proof over 3-4 hours. In first 90 minutes, stretch dough every 30 minutes, pulling up edges and folding into middle. Then just let it do its thing until you're ready for the final rest. It will double or triple in size beautifully!

Pre-heat French or Dutch oven in 500* degree oven (475 is fine, I usually account for lost heat during the time I transfer the dough, keeping the oven open for a minute or so). 

For this final rest, gently transfer dough onto floured surface. Stretch gluten cloak however you like. In this recipe, it pulls from the edges up to the middle, putting the "pretty" side on the bottom. You can also do it more traditionally, pulling the edges under, so the stretched gluten cloak is on top. So, too, when putting in a proofing basket, you can do it pretty side down or pretty side up. When transferring to your French oven, you can do it either way as well. 

HOW I DID IT: I did as the recipe called for, pretty side down to stretch and proof  in the basket on a well-flowered cloth. When turning out, I turned it pretty-side-up onto a piece of parchment paper. I sliced the top in a swirl with a wet knife. Using the parchment paper, I lifted it gently into the French oven and covered with the lid.

Decrease temp to 475 after transferring the dough. 35 minutes lid on, 10-15 minutes lid off until deep golden brown. Remove from French oven using the parchment paper as a sling, remove parchment paper and let rest on a cooling rack for 10-20 minutes. Don't cut in too early! You want it to cool enough that the crumb settles. This last bit of steam from the oven needs to stay trapped in there to have the bounciest crumb.

* Bottom of my bread turned a burned color, but did not taste overly burned. I think I would just have it at 475 the whole time after all, so the bottom doesn't get heated so much.

*************************************************

Original Recipe


Overnight poolish (ingredients for one)

  • 250g strong white flour
  • 250g cool whey 
  • 0.5g dried yeast or 2g fresh yeast 

Remaining ingredients 

  • 175g strong white flour 
  • 60g strong wholemeal flour 30g 
  • dark rye flour 
  • 8g salt 
  • 2g dried yeast or 6g fresh yeast 
  • 125g warm whey (40ºC) 
  • 50g honey 
  • 50g butter, softened 

Method 

The evening before mix the poolish ingredients in a large bowl so that the mixture will have 12 to 14 hours fermentation at around 20/22ºC. 

Next day start by dissolving the yeast and honey in a little of the warm whey and leave for 10 minutes. Meanwhile weigh out the remaining flours, salt and butter. Add the remaining flours, salt, butter in small pieces and warm whey to the poolish and mix by squishing between your fingers. Wet your hands first so the dough doesn’t stick. 

The dough is going to prove now for 3 to 4 hours, kept warm and covered. At the start of this time give the dough 3 folds at 30 minute intervals. Make the folds by going round the dough (in the bowl) pulling the dough up and out as far as it will go without tearing then folding it back into the middle. 

At the end of the proving, ease the dough out onto a floured surface. If you are making two boules now is the time to divide the dough. Go round the dough pulling an edge gently away from the centre then folding it lightly back into the centre. Do this till you have a neat high mound of dough. 

Lay the dough, pretty side down in a well floured proving basket or bowl lined with a well floured tea towel. Let it prove for about 40 minutes in a warm and moist place (covering the dough bowl with a larger bowl works). Around 20 minutes in advance heat the oven to 240ºC with the casserole plus lid. Gently tip the dough onto floured work surface. 

Take the (VERY HOT) casserole out of the oven, pick up the dough with well floured hands and ease it into the pot. Replace the casserole lid Bake at 230°C (fan 220ºC) for 35 minutes. Remove the lid and bake for another 25 minutes. 

Overnight poolish ingredients for two: (literally just double all ingredients)

Sausage, Walnut, and Blue Cheese Pasta

by Thursday, January 21, 2021

INGREDIENTS
1 lb sweet or hot Italian sausage (removed from casing if in casing) 
1 large shallot minced 
4 cloves garlic 
6 oz blue cheese 
2 cups cream 
1 cup walnuts 
1 lb pasta of choice (I wanted penne, but only had spaghetti, and it worked great) 
Optional: fresh sage, sliced thinly.


DIRECTIONS
Heat oven to 350. Put walnuts on a baking sheet and cook for 10 minutes. Remove to cutting board and chop. Not too fine a chop, leave chunks.

At the same time, boil water in a big pot, heat oil in a large pan over medium heat. Cook pasta until al-dente (about 2 mins less than time on package).

Brown sausage over medium heat, breaking up until almost no pink showing.

Add shallot and garlic and cook 2-3 minutes until softened and fragrant.

Add cream and blue cheese to pan and bring to a boil. Turn heat down to medium-low, add sage, and stir frequently as sauce reduces.

Strain pasta, saving a cup of liquid. Put pasta in the cream sauce and continue cooking pasta a couple of minutes in the sauce. Add some of the cooking liquid a couple tablespoons at a time to create your preferred sauce consistency.

Serve portions in bowls, top generously with chopped walnuts.

Shay's Favorite Turkey Recipe (and her personal tweaks)

by Friday, November 13, 2020
I've said it before and I will say it again:
Alton Brown's Brined Turkey?
Best. Turkey. Ever.

You can debate all you want about whether brining helps or not. I have tried many other recipes--dry brines, wet brines, unbrined, grilled, smoked, even sous vide--and every time we come back to this recipe as the absolutely best combination of flavor and juiciness. Period.

My only adaptation is I always spatchcock my birds now. Don't be afraid of spatchcocking, it is SO EASY. If worried, test it on a whole chicken before you try the turkey. I highly recommend getting poultry shears for turkey, as the thicker bird is harder to do with just knives or kitchen shears.


Quick Brine Tip:
Alton suggests putting your bird directly into a cooler. We did that, and it was a mess. It worked, but no thanks. We also did a food safe 5 gallon bucket, but without insulation (and not being willing to put it outdoors and trust a lid with a brick on it to keep it safe from critters), we struggled to keep it cool enough all night. We now get the largest roasting bag available--food safe!--make the brine and MAKE SURE IT IS COOLED BEFORE YOU IMMERSE YOUR BIRD IN IT. Do not put hot brine in with your cold turkey, that could put your poultry in the danger zone. Then drop the turkey into the bag and fill with the brine solution. Then we tie it off tight and place that into a cooler with ice, rotating it and adding ice as needed a few times throughout the 12-18 hours before cooking, for good measure. So much easier to keep at a safe cold temp, and simpler clean up.

I do use Alton's suggested "molded breastplate" foil tent over the top of the bird (outlined here) as it gives us the most consistent cooking results, but I personally remove it in the last 30-45 minutes of cooking to crisp up the skin a bit. I MUST have crispy skin, and his recipes just don't take that into account. I have not found that this dries out the breast in any significant way, and I get crispier skin. Don't like that chance of dry white meat? In the last 5 minutes of the 15 minute resting period, peel off the skin and saute it in a pan with a little butter. Then fist fight your sister over who gets to eat it all. Oh...just us, then?

Shay's Stuffing Tweak Directions:
  1. Line roasting pan with heavy duty foil (for easier cleanup later). Spray with cooking spray or oil a little with olive oil.
  2. Make a little foil boat for the aromatics, set it in the middle of the roasting pan.
  3. Put a ring of stuffing around the outside edges of the pan, reserving any you want to keep vegetarian.
  4. Place spatchcocked turkey on top of bed of stuffing (or you can put a rack on them and the bird on top of that for easier removal later for the rest period) and cook for recommended time.

This makes stuffing with the turkey drippings dripping on them throughout the cooking process--making the stuffing taste like "stuffed stuffing" without the salmonella risk or turkey meat drying out--while allowing you to have an aromatics component that would have been unseated by a pile of stuffing.

You can also have part stuffing, part cubed potatoes under the turkey if you wish. They also absorb the drippings and become soft and flavorful. If you want crispier potatoes, at the end of the cooking time, you can remove the stuffing and turkey to rest, then put the potatoes under the broiler for a few minutes to crisp them up a bit. Turn them one for more even browning. (pro tip: keep a close eye on these potatoes, as all the fats and oils they have absorbed means they will crisp quickly and burn without supervision).

You can sub the russet potatoes for sweet potatoes; a mix of russets and sweet potatoes; make it a root veggie mix with carrots, turnips, potatoes, etc. Whatever you like.

One pan cooking makes it easier on you and less coordination. Results are the best in the 25+ years I have been cooking turkeys.

ONLY DOWNSIDE: If you make your gravy from pan drippings, with this method your drippings will mostly or entirely be absorbed by the starches beneath. BUT, my momma makes a fabulous gravy from pan browning the neck and giblets, and then making a base broth from them. It is essentially this recipe, but browning the neck and giblets first to get that caramelized, maillard-reaction flavor in the gravy that you would miss from the drippings. It whips up pretty darn quick, and is something you can do while the turkey is finishing cooking. Don't want the additional steps? Try a delicious make-ahead gravy to really impress.

Next year, I may try Alton's Turketta!

Buttermilk Bread

by Friday, November 22, 2019

We have two new neighbors move in within the past month, and I have been wanting to get over to welcome them and share contact information for weeks, but it didn’t work out over and over due to illness and life. This week, using a recipe that is new to me, I baked a couple loaves of bread—one for each—intending to stop by and meet them both while it was nearly still warm. But I was way too exhausted each evening, and Chris got off work late to boot.

Finally tonight we were able to try both doorbells, but only one was home. Lovely to meet the neighbor, bread was perfect given they were making soup for dinner at that very moment, so success. But the second loaf isn’t going to hold another day (or two) if we can’t pin down the other neighbor, so I decided I would make a fresh loaf, and we got to try the bread.


OMG!

My new favorite!! So simple, so tasty, and uses buttermilk powder which I keep on hand for other recipes and keeps a long time. The crumb is dense and moist, the crust firm without being too hard—perfect sandwich bread. Here ya go, baker-friends:

(PS I did an egg white and water wash before baking and it came out shiny!)

INGREDIENTS
  • 6 cups bread flour
  • 1 cup water (hot tap water works great)
  • 2 Tbsp sugar or honey
  • 4 1/2 tsp active dry yeast (or two packages)
  • 2 tsp salt
  • 1/4 tsp baking soda
  • 4 tbsp buttermilk powder + 1 cup water (or 1 cup buttermilk)
  • 1/3 cup butter, cut into pieces
  • Egg white + water (or a little melted butter) for finishing
DIRECTIONS
  1. Mix together 4 cups of your flour to the sugar, yeast, salt, buttermilk powder and baking soda. You can do this in your Kitchenaid or by hand.
  2. Combine hot tap water (or heat buttermilk in microwave to 115/120ish) and butter. The butter doesn't need to melt, but it will melt a bit and that's fine. Just make sure the water isn't too hot or it will kill your yeast. You want the yeast warm and happy and munching on those sugars.
  3. Add this liquid/butter to the flour mixture and mix on Speed 2 for a minute.
  4. Begin adding the rest of your flour a 1/2 cup at a time, letting it incorporate between scoops, scraping down sides as needed, until it forms a soft dough. Let it knead the dough for a couple of minutes, or remove to a lightly floured surface and knead by hand for 6-8 minutes if you prefer.
  5. Form dough into a big ball and let rest under a towel for 10 minutes. It will rise a bit and look smooth and lovely when it's done.
  6. Divide your dough into two, roll each half in turn on a lightly floured surface to about a 7"X12" rectangle. You can gently stretch and massage it into shape as you go.
  7. Roll it up tightly like a jellyroll, tug the ends into a little flap and fold to the underside, forming a smooth log with the seams pinched closed on the underside. Repeat with other dough piece.
  8. Line two loaf pans with parchment paper or grease, placing a dough log in each.
  9. Cover pans with a towel and let rise for 30-45 minutes.
  10. Mix an egg white with water (50/50), brush tops of each loaf for a glossy finish. (alternately, you can brush with melted butter at the END of the baking process)
  11. Bake at 375 for 30-35 minutes. Remove from pans to a cooling rack. Enjoy!


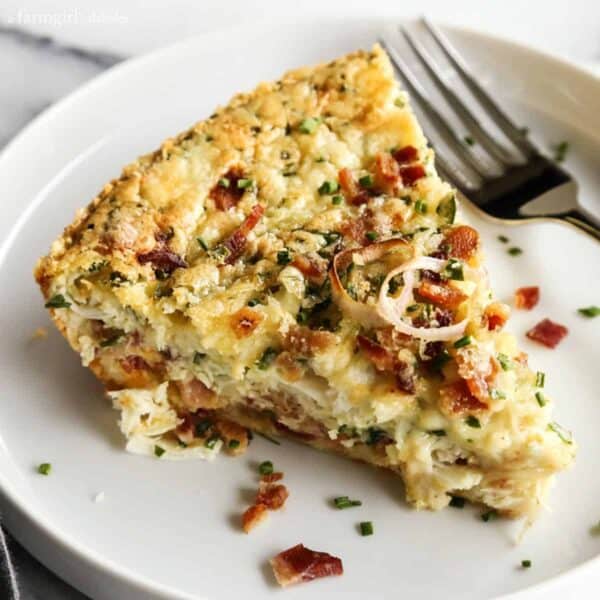
Caramelized Onion, Bacon, and Mushroom Crustless Quiche

by Monday, September 23, 2019
1 onion, sliced intos trips
3 Tbsp butter, divided (or cooking oil of choice)
4 slices bacon, cut into 1/2" chunks
4-7oz mushrooms of choice, sliced
4 eggs
1 cup cream
1 cup + cheese of choice (mozzarella, gruyere, cheddar, parm, mixed if you like)
salt & pepper
optional: thyme, parsley

Heat oven to 350
Cook onions in 2 Tbsp butter or oil over low heat, covered, stirring every 5 minutes for ~20-25 minutes until well softened and ideally starting to brown a little.
Raise the heat a bit to medium-low. Move the onions aside and add bacon chunks in with onions and cook until bacon is cooked, but not crisping. Meanwhile, continue to stir and move the onions on their side of the pan, letting bacon fat render and add to the onions, which should continue cooking and begin lightly browning and caramelizing.
In another pan, melt 1 Tbsp butter. Add mushrooms and cook through until lightly browning. Salt and pepper as you like.
Whisk eggs and cream together. Add cheese and mix thoroughly, salt and pepper, season with thyme if you like.
Drain mushrooms, onions, and bacon, then mix and put into 9" pie plate, distributing evenly at bottom.
Gently pour egg and cheese mixture over the top. Sprinkle top with some grated parmesan if desired.
Bake for 45 minutes or until golden brown and knife in the middle comes out clean.


Missing Whole30??

by Monday, July 22, 2019
Just look at the scandalous dollop of sour cream! Sassy!
While I don't miss all the work, I definitely miss how I ate on Whole30. The food was really good, and I was eating three solid meals a day. So today I am trying to resolve to re-adopt some of the behaviors I had on Whole30, like better food prep so I don't just reach for bread or a wedge of cheese when I am ravenously hungry, and making sure I have some easy breakfast options at-the-ready. The good news is, I don't have to be "compliant".

Last night I made my favorite recipe from Whole30: egg roll in a bowl. It makes enough for dinner and a lunch and is so damn tasty. I made it with the "compliant" chili sauce I prefer over Sriracha, but I could--*gasp*-- use store bought mayo instead of my own for the sauce.

This morning I made myself some chia seed pudding for the week to go with my granola and fresh summer berries. And I added cinnamon, vanilla extract and a teaspoon of honey! *pearl clutch* SAY IT AIN'T SO!

I have already done some meal prep recently when QFC had giant bone-in pork shoulders on sale BOGO. I cooked up about 10 lbs of spicy pulled pork and portioned them for meals--I kept the flavoring fairly neutral, so they can be seasoned for different cuisines. I can actually make pulled pork and veg bowls with RICE if I want. So rebel. Much anarchist.

I want to keep this trend going a bit and see what more habits I can adopt. Chris has said he would be into doing Whole30 again, or adopting a modified Whole30 as a lifestyle. I say great, if he helps a bit more with the meal planning (he did a BUNCH of cooking during Whole30, but mostly it was my leg work on assembling the menu plans, which was a bit tiring for 45 days straight).

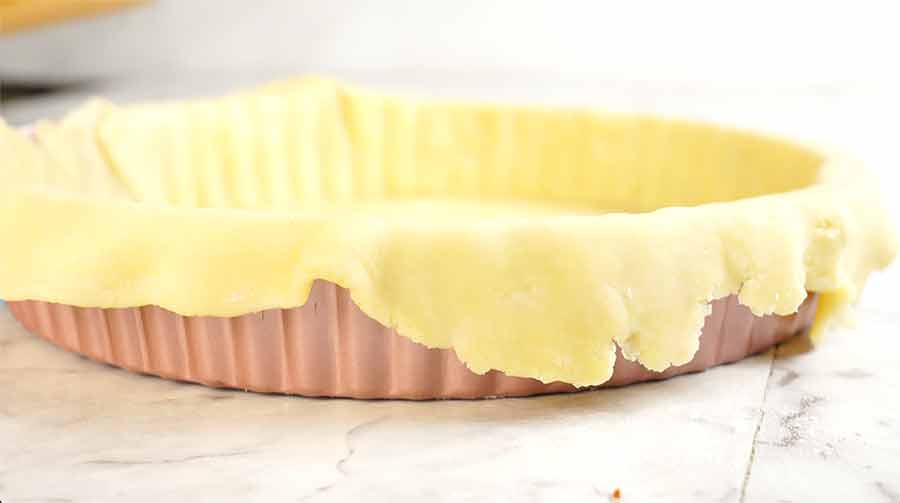
Super Fast Easy Quiche Crust

by Monday, May 27, 2019
I am terrible at baked goods in general, so it is unsurprising that I avoid crust recipes of any kind. I often keep a Pilsbury fridge crust on hand for when I want to make something with a crust. So I was very happy to find this recipe to be very quick to put together, and allowed me to make a quiche on the fly this morning. I am adding the changes I made to it to make it work for me.

INGREDIENTS
  • 1 cup flour
  • 1⁄2 teaspoon salt
  • 1⁄4 cup olive oil or 1/4 cup canola oil (or possibly 1/2-1/2 oil and butter)
  • 1⁄4 cup ice water (my fridge door water was cold enough)
DIRECTIONS

  1. Mix flour and salt with fork. Optionally add some herbs, like dried rosemary, oregano, and/or thyme to the dry ingredients. (Could I add sugar and vanilla for a sweet crust? I think so!)
  2. Beat oil and water with whisk or fork to emulsify
  3. Add oil/water into flour and mix with fork.
  4. Press into 9" pie crust, trying to keep the thickness even as possible.
  5. Pre-bake/blind bake for 5-7 minutes to crisp up
  6. Fill with quiche mixture of choice and bake at 400F until done.

While we're here, this is the quiche recipe I made:

INGREDIENTS
  • 5 large eggs
  • 3⁄4 cup milk or cream
  • 3⁄4 teaspoon salt
  • 1⁄4 teaspoon black pepper
  • 1 cup cooked ham cubes (store-bought cubes for pizza toppings)
  • 1 1⁄2 cups shredded cheese divided (I used 1 cup cheddar, 1/2 cup mozarella)
  • 3 tablespoons green onions (I used chives from my garden)
DIRECTIONS

  1. Preheat oven to 400 degrees F.
  2. Prepare pie crust in a 9" pie plate, crimping the top edges if desired.
  3. Blind-bake crust for 5 minutes if you would like to
  4. In a large bowl, whisk together eggs, milk, salt and pepper.
  5. Sprinkle ham, 1 cup of cheese, and green onions into the pie crust and pour the egg mixture over top. Sprinkle remaining 1/2 cup cheese on top of egg mixture.
  6. Bake for 35-40 minutes until the center is completely set. Let cool for 5-10 minutes before slicing and serving.

Savory Meat Hand Pies

by Friday, April 26, 2019
I have never been a meat-in-pastry fan. But like many things I thought I didn't like, it's about finding the right recipe and preparation to turn you into a convert. My meat pie gateway was turkey pot pie I made with Thanksgiving leftovers, which I further refined the next year based on my resdient pot-pie-lovin'-husband's requests.

Empanadas and hand pies fall into the same category. I have some good ones, but nothing I would order off a menu. But Chris sure loves meat pies, and in searching about for good hearty quick bites for a game night we were hosting, I decided to surprise him and concoct a hand pie recipe I thought even I might like. Even wilder? I USED LAMB. I never use lamb. I used to hate lamb. Now I find that when in a meat blend--like a meatball or meatloaf--it can be that subtle *something* you can't quite put your finger on. The mouthfeel changes; there is a flavor there that beef or sausage doesn't impart, alone or together. So I decided to include it in my recipe. And since I was using lamb, I decided to pop some cinnamon in there as well.

I am in love with my recipe. And I didn't write it all down when I made it! I could cry. So here is my attempt to write down what I remember, and when I make it again, I will come back and edit as needed.

Note: this makes a LOT of little pies. By my count, this entire batch would make about 80+ pies depending on how thin you roll your dough out. I made the entire recipe, then divided them out in rough thirds, using one immediately and freezing the other two. Making them in batches, this most recent batch made 26 pies and there was some filling left over for maybe a half dozen more. Sorry I am not more precise than that!

There are two opportunities to make these ahead. The first is to make the meat mixture, portion and store until you want to continue to the pie making stage. The second is to fill and prep the pies and hold them until you intend to bake them. I have marked each optional hold step with HOLD below.

INGREDIENTS

  • 1 lb lean ground beef (I used wagyu, 11%)
  • 1 lb ground sausage
  • 1 lb lamb
  • 2 cups low sodium chicken stock (used home made)
  • 1 medium onion, finely diced
  • 5 cloves garlic, minced
  • 8-10oz mushroom of choice, finely dice (I used cremini)
  • 2 Tbsp cumin
  • 2 Tbsp thyme
  • 1 Tbsp cinnamon
  • salt and pepper to taste
  • 2 Tbsp flour (for thickening)
  • 1 package of prepared pie crust PER BATCH (3-4 packages total)
  • 1 egg white, mixed with 1 Tbsp water PER BATCH

INSTRUCTIONS

PREP MEAT MIXTURE
  1. In a Dutch oven over medium heat, add all meat and cook, rendering fat until most of all pink is gone. Drain out most of the fat, leaving just enough to keep meat from sticking, and continue browning until a fond (layer of browning) builds up in the bottom. Deglaze pan with a cup of the chicken stock, scraping up all the brown bits as best you can. Transfer browned meat to a bowl and set aside.
  2. Add onion and garlic to the pan, season with a couple pinches of salt, and cook until translucent. If you need to use a little oil to keep things from burning, do so as needed. Remove onion and garlic to the bowl with the meat.
  3. Add mushrooms to the pan and cook over low heat until they are softened and a little glossy, releasing a little of their moisture and shrinking in size a bit. Add meat mixture, all spices, and the other cup of stock. Cook over medium to medium-hight heat, stirring frequently and reducing and thickening the mixture, about 5 minutes. Salt and pepper to taste. Add the flour are stir in thoroughly then remove from heat.
  4. HOLD!
At this point you can portion out  and label meat for storage, allowing to cool in the fridge before putting in the freezer. To use later, simply defrost the mixture in fridge before using. If you want to make any or all now, make sure your filling is thickened and not too hot, so you don't just melt right through your pie crust as you're filling them. Room temp is ideal. When you're ready, proceed to next step.

PREP THE PIES
This is the outline for a single batch; simply repeat for additional batches. 
  1. Line two baking sheets with foil.
  2. Prepare a surface with some all purpose flour and roll out one of the crusts to desired thickness. I roll mine until JUST before being transparent. Any thinner and they will tear, any thicker and they tend to overpower the filling.
  3. Using a 4" circle pastry cutter, cut out disks from the dough and set aside. (I used a small round twist n' loc Ziplock container for mine. You can use a small bowl or whatever is on hand, tracing the edge with a knife). When you run out of space to cut more, ball up remaining dough and roll it out to make more until you run out of dough. Repeat with second crust.
  4. Working on a clean surface, lay out a single round and spoon a heaping tablespoon of the meat mixture into the middle of the round. Don't overfill or you will get exploding pies. They should be plump, but not tearing open from the stress of the filling. Brush edge with a small amount of egg white mixture, lift and gently press edged together. 
  5. Use the tines of a fork to seal edges, or whatever pretty method of sealing edges you prefer. Place pies about 1 inch apart on the foil lined baking sheets. Using scissors or a knife, make one or two small vents in the top of each pie.
  6. HOLD!
At this point you can refrigerate or freeze your hand pies. To refrigerate, cover baking sheets with plastic wrap and hold for up to 48 hours before baking. Any longer and the pastry tends to dry out and it won't bake up as well. If freezing, freeze individually on baking sheets first, then transfer to a bag or other container. This will keep them from sticking together during the initial freezing step. They will keep well up to 3 months. You can bake straight from the freezer, but add 5-10 more minutes to your cook time.

COOK THE PIES
You can cook as many or as few of these pies as you like. We cook up two per person for a quick lunch or snack. We will cook up two to three per person to pair with some sides (mashed potatoes!) for dinner.
  1. Preheat your oven to 400 degrees
  2. If you are baking from frozen, prep a baking sheet by lining it with foil. If cooking right away or from the fridge, remove plastic wrap from your already-prepped baking sheet full of pies and you're good to go.
  3. Brush the tops if each pie with a little egg white/water mixture
  4. Bake for 12-15 minutes or until tops are golden and glossy. Remove from oven and let cool for 5 minutes or so before serving.
  5. DONE!
Baked pies can also be frozen for simple reheating later. As with unbaked hand pies, freeze individually on a tray and then put in another bag or container for longer term storage to keep them from sticking together.

Variation options:
  • Add some veggies to the meat mixture, like peas or chopped carrots.
  • Substitute the pie crust for puff pastry, simply adjust cooking times and temps according to your puff pastry instructions.
  • Add or subtract different meats for varying flavors. Beef and bacon is a popular option on the interwebs.
  • Some recipes call for fruit in them, making for interesting flavor options, such as minced fig, dates, or raisins with a higher ratio of lamb for a Mediterranean spin. Maybe some diced apple and a higher ratio of sausage. Lots of options to play with here.
  • Play with umami flavors by substituting some of the chicken stock with Worcestershire, fish, or soy sauce. Use beef stock instead of chicken stock for a beefier flavor.
  • In Australia, beef-based hand pies are known as "party pies", and are often dipped in ketchup. Some sort of dipping sauce that suits your meat filling sounds like a great option!


Mexican Pork Carnitas - Slow and Fast Cooking

by Thursday, May 03, 2018
I have cooked pork carnitas many different ways, including trying to do it "traditionally" in lard. I'll just say "Hell to the no am I doing that mess again!" I can get moist, delicious results without all the greasy, messy lard business. My main inspiration for my carnitas comes from none other than Kenji at Serious Eats. I still make this full recipe from time to time, but I carve off some time by using jar salsa instead, and season various ways depending on my taste on a given day.

I make 4-5lbs whenever possible and eat the leftovers for a week. I will pluck some cold from the fridge for a snack; brown some in a pan, add avocado, and crack an egg over it for breakfast; throw some on nachos;and of course traditional tortillas and fixin's.

I also feel I need to say that every portion here is approximate. I don't really measure stuff any more as my recipe evolved. If I make the dry rub/seasoning and it doesn't seem like enough, I toss in more. Need more liquid? Add more. It isn't a science for me, is what I'm saying, but it always comes out SO DAMN GOOD. I just got done stuffing my face with cold leftovers from making this last night. Nom nom nom.

INGREDIENTS
3-5 lbs boneless pork shoulder
1 onion, quartered
3-5 cloves garlic
4 Tbsp cumin
4 Tbsp oregano
2 Tbsp garlic powder
2 Tbsp sea salt
fresh cracked pepper as desired
2 cups chicken stock or water
1 cup orange juice or juice from one large orange
optional: 1 16oz jar salsa verde in heat level of choice*
optional: a hot pepper of choice, seeded and sliced

FIXINGS
tortillas, warmed in foil in the oven (we prefer flour)
sour cream
avocado/guacamole
cilantro
some of the green salsa*
pickled red onions
hot sauce
queso fresco
fresh limes
side of beans and/or rice

*Spoon out some of the green salsa if you want some with your meal. If lots of people are having this, just get a second jar.


SLOW COOK METHOD - Stove / Oven
  1. Pre-heat oven to 275.
  2. Smash and cut garlic into small chunks.
  3. Cut pork into 3-4 inch cubes. Combine dry ingredients (cumin, oregano, garlic powder, salt, pepper) and sprinkle/pat/rub all over meat. Slice little holes in the meat and poke garlic inside.
  4. Heat a high smoke point oil (like safflower or canola oil) in open Dutch/French oven over medium-high heat (or similar pot that can later go in the oven with a lid). Using tongs, brown sides of pork chunks and then set aside.
  5. Deglaze pan with chicken stock or water. Toss in onions and break apart, add more smashed garlic if you like (I like) and any sliced peppers you are using. Tuck meat into pot--you're looking for a tight fit in a single layer as is possible, with the garlic and onion smashed between the meat chunks.
  6. Pour the jar of salsa over the top of the meat, if using. Pour orange juice or water into jar to swish out the last bits of salsa and pour that into the pan as well, filling the pot so the liquid level is covering halfway up the meat.
  7. Put lid on pot (or tightly wrapped foil in a pinch) and cook for 2.5-3 hrs
  8. Line a baking sheet with a layer of foil or two. Remove cooked meat to sheet (it should be fairly falling to pieces). Shred with two forks. Move baking rack higher up in the oven and set to broil. Crisp meat in 3-5 minute intervals, using tongs to turn meat in between to get more crispy bits. This step is optional, but for me it's not. The crispy bits are where it is AT!**
  9. Alternately, you can just take the portion you are eating immediately and crisp it in a pan on the stove, storing the rest of the meat in its own foil wrapped tightly in the fridge.
  10. While the shredded meat is browning, put tortillas into foil and close loosely, placing on the bottom rack of the oven to steam/warm. Then I prep the fixings I like best: sour cream, avocado, shredded cheese (we like to buy Tillamook Mexican cheese blend for simplicity), some of the green salsa, and fresh cilantro and lime wedges. My husband goes simpler with just the sour cream and cheese, sometimes a hot sauce of choice over the top.


"FAST" COOK METHOD - Pressure Cooker / Instant Pot
This cuts prep time down and halves the cooking time, so while it is still 90 minutes in the pot, it's a lot less time from fridge to the table.
  1. Cut pork into quarters. Season all over with dry ingredients (cumin, oregano, garlic powder, salt, pepper). Cut small cavities in meat and stuff chunks of garlic inside.
  2. Set IP to sautee, heat oil, and brown all sides of the meat (if yours has no sautee function, do this in a pan on the stove before transferring to the pressure cooker).
  3. Add liquids (stock/water/OJ), onions, peppers (if using), and additional garlic if you like (yes, yes I do). Pour salsa over the top, if using.
  4. Cover and set to high for 75-90 minutes (depending on size of shoulder you got). You can quick release or natural release, depending on how eager you are to get it outta there. Use this time to prep your toppings/fixings, including setting the tortillas in foil sleeve in a warm oven for at least 5 minutes before you eat.
  5. If you're in a hurry, you can shred this right in the IP and eat now. I still always brown my meat under a broiler, so if you want to do that, jump to Step 8 in the Slow Cook method above to continue. Alternately, some people will pour the cooking liquid out of the pot and brown it in there to make this more of a "one pot meal". Just add some oil and brown in batches.**
**If you over-dry your carnitas, you can always just spoon some of the cooking liquid back into the shredded meat to juice it back up again. I haven't needed to do this, but it's good to have in your back pocket just in case it gets too dry for your taste.

FROM FROZEN
One of the best things about an IP is the ability to cook from frozen cuts. I recommend no larger than a 3lb boneless cut for this method, because it probably won't fit in your liner if it's larger and can't be cut down due to it being a cold brick!

You can't sear or stuff this meat, obviously, so the flavor won't be as good, but it's good in a pinch, and you can season it up on the back end, and make sure to include delicious additional ingredients like queso fresco, sliced jalapenos, radishes, etc.

  1. Season frozen shoulder/butt with salt and pepper and put in pot.
  2. Add all ingredients to the pot, pouring stock/water/juice in, adding onions and garlic, and all dry ingredients. Pour salsa over the top last. Close lid, set to high pressure and cook 30 minutes per pound. NATURAL RELEASE is important on this one. It gives it a little more cook time, but also allows the meat to reabsorb some of the moisture it released during cooking.
  3. At least 5-10 minutes before you're ready to open the lid and shred the meat, warm your tortillas and prep your toppings.
  4. Jump to Step 8 in the Slow Cook method, or just shred in pot and serve without crisping if you're in a hurry. Add more salt/pepper/seasoning as you like to the shredded meat to taste.


Cheese-stuffed Meatloaf

by Wednesday, April 25, 2018
I have string cheese around pretty much all the time. Because instant-cheese satisfaction makes sense to me. I wondered if mozzarella stuffed meatloaf was a thing, and of course it was. I had the ingredients and I made it. It was fairly heavy for a warm day meal, but it was delicious, so I'm writing it down.

Cheese Stuffed Meatloaf

INGREDIENTS

  • 1/2 lb ground beef
  • 1 pkg (12oz/4ea) Isernios Hot Italian Sausages, removed from casings
  • 1 stalk celery, fine chop
  • 1 large carrot, fine chop
  • 1/2 cup Italian panko breadcrumbs
  • extra rosemary as desired
  • 1 egg
  • sat & pepper
  • 4 sticks string cheese, um...out of the packaging. :)
  • 3 Tbsp ketchup
  • 2 Tbsp dijon mustard


INSTRUCTIONS

  1. Heat oven to 350.
  2. Line a loaf pan with foil, leaving edges up like a sling
  3. Mix all ingredients, save for the string cheese, with your hands, combining ingredients well.
  4. Take about 3/4 of the meat mixture and form a sort of "tray" in the bottom of the loaf pan about 1-1.5" thick with slightly raised sides.
  5. Lay mozzarella sticks out in this trough, tuck the rest of the meat mixture on top of and around the mozzarella sticks.
  6. Bake uncovered in oven for 1-1 1/2 hours
  7. Mix together ketchup and dijon to make a simple glaze (alternately, try a splash of some leftover favorite spaghetti sauce)
  8. Brush top of meatloaf with this sauce and broil until starting to bubble and brown
  9. Remove from oven, lift meatloaf out with sling and place on cutting board to rest for 3-5 minutes
  10. Slice and carefully transfer to plates.


I feel like the "rubberiness", for lack of a better term, is wha makes the string cheese a good candidate for filling. It doesn't all spill out when you cut it. Resting it helps as well, letting it cool down a smidge so it regains some structure.

In the future I could see adding some veggies to this middle zone, maybe some red peppers, spinach, etc. I didn't have them for this go-round.

Browned Butter Rice Krispie Cheesecake with Bourbon Caramel Sauce

by Wednesday, April 18, 2018

Browned Butter Rice Krispie Cheesecake with Bourbon Caramel Sauce

INGREDIENTS
Browned Butter Rice Krispies
4 Tbsp butter
1/2 a stick
8 cups Rice Krispies cereal
1⁄2 tsp vanilla extract
1 tsp sea salt
16 oz mini marshmallows

No-bake Cheesecake Filling
16 oz cream cheese 2 packages
14 oz sweetened condensed milk
1⁄4 cup fresh lemon juice
1 tsp vanilla extract

Bourbon Caramel Sauce
1 cup sugar
1/4 cup water
1⁄2 cup Heavy cream
1 Tbsp bourbon

DIRECTIONS
Make Browned Butter Rice Krispies "Crust"

  1. Heat a large nonstick sautee pan over medium heat until hot. Add cereal and stir occasionally until lightly toasted and fragrant (5-7 minutes). Remove from heat and set aside. 
  2. Melt butter in a saucepan over medium-low heat, stirring constantly. It will begin to foam, and soon after will brown, emitting a nutty aroma. Turn off the heat and add the salt and vanilla.
  3. Add half marshmallows at a time to browned butter, stirring regularly until marshmallows are melted. If you need to, return to low heat to aid the melting process. 
  4. Add rice cereal to marshmallow mixture and mix until cereal is evenly coated with marshmallow mixture. 
  5. Transfer 2/3 to a glass pie pan/dish or springform pan, and the rest to a separate baking dish. Using the bottom of a flat bottomed glass, press rice mixture in pie pan into a "crust" about 1/2'-3/4" thick. Press the other portion of rice mixture to a similar thickness--we will cut this up to use as a garnish later, so it doesn't need to reach the edges of the pan. Set aside to cool while you make the cream cheese filling and sauce.


Make the Cheesecake

  1. Beat cream cheese in large bowl until smooth using electric mixer or Kitchenaid mixer. 
  2. Blend in the condensed milk a bit at a time, scraping down sides periodically. Add in lemon juice and vanilla. 
  3. Pour filling into Rice Krispies crust, smoothing the top. Cover with plastic wrap and refrigerator for 2 1/2-3 hours until firm. Meanwhile, make the sauce.


Make the Sauce

  1. Simmer sugar and 1/4 cup water over medium heat, swirling pan rather than stirring for 15 minutes until a deep amber color. Keep a close eye so it doesn't burn.
  2. Turn off the burner. Remove pan from the heat, and slowly add cream while stirring.
  3. Add bourbon and optionally a pinch of salt, then put back on burner with residual warmth and stir all together. 
  4. Transfer to a heat-safe dish or bottle to let cool (canning jars are great for this). Sauce can be covered and stored in the refrigerator. When ready to use, bring to room temp, heat in a warm water bath, or microwave opened jar for 30 seconds in the microwave.


Cheesemaking With Sous Vide

by Tuesday, February 13, 2018
Thanks to Sous Vide Everything's recent video on making Queso Blanco cheese with sous vide (see video at end of post), I decided I wanted to give it a try. All I needed was a gallon of milk, which was easy enough. I already had the vinegar, cheesecloth, and circulator. In researching a few other similar methods, I also discovered some options for goat cheese, which I also wanted to try. So I stopped by Central Market, where I knew I could get good organic cow's milk as well as goat's milk. On the way home I swung by a homebrew shop to get some chevre starter and a mold/form similar to the one in the video. I also grabbed some rennet for future cheesemaking attempts, and grabbed a couple chef pans from Seattle Restaurant Supply to make the process a little easier to set up now and in the future, since I don't have a good large shallow pan for larger sous vide operations.

Once home, I set straight to work on the Queso Blanco. Immediately I got the sense the this was a more labor-intensive way to do this than the good old fashioned stovetop. Setting up sous vide is worth it for the right applications, but is just trading stove-tending time for set up and break down time in other cases, as well as a lot of wasted water (in summer I will water my garden with it and it isn't so wasted, but in winter...it tends to just go right down the drain, which I am not pleased about). Such was the case here. I simply had to bring the milk up to about 180 degrees without scalding it, then add the acidic element--in my case apple cider vinegar--to form curds. Then strain with cheesecloth, season, and set into the mold. Voila.

I started with hot water from the tap, but in a large shallow container like this, it was cooling as I was filling. So it took a bit of time to get the water up to temp, and even longer of course to get the milk to come to 180. I just went and watched a movie, knowing that I couldn't possibly scald it or overheat it--that was the one good reason to have it sous vide. Unfortunately partway through, our Nomiku decided to just stop working. Luckily I was nearby to see the screen tell me as much, as it gave no other warning. Luckily, we had our Anova nearby so I swapped it out and kept going, but now we may have a dead Nomiku? Hrm... No time to troubleshoot.

Basically everything went just as demonstrated in the video. I added significantly less vinegar however, as most recipes I saw called for 1/4-1/2 cup compared to their fully 1 cup serving. I ended up using a half cup and it was plenty. Any more and I think the cheese itself may have tasted vinegary. At this point, we had plenty of curds...and a very bland cheese.

I poured it into the cheesecloth, squeezed out excess moisture, then turned it into a bowl. I seasoned with Kosher salt, stirred with my fingers to incorporate it, and pressed it into the mold. Today I have a beautiful little cheese. Probably a beautiful little bland cheese.

Edited to add: I did finally try the cheese. Despite feeling like I salted the hell out of it, the salt is very very light. I remember this from a cheese-making class we took maybe 10 years ago, now. Salt it more than you think, as it will mellow. The vinegar flavor is coming through, not in an entirely bad way; but if we had used an entire cup I think it would have been unsavory to us. Ultimately, the cheese is pretty...plain. I mean, I guess that's the point of queso blanco--to be a more neutral kind of base cheese? I think if I made it again, I would a) add more salt definitely and b) herb it up. We're going to try it on tacos for dinner tonight (using the whey from the process to marinate the chicken, which is also a new thing we're trying), and will see how it goes. I can also make a flavored dip from it

I can say the mold was nice to have, for aesthetic results, but is entirely unnecessary.

So on to the goat cheese. This one needed to be heated to a much lower temperature, 87 degrees, and then had to be held at 73-ish for 12+ hours. This is where I thought the sous vide would really shine, being able to hold the cheese at a precise temperature all night long, letting the cultures do their work in an optimal environment.

I washed the the inner liner from the cow's cheese and poured in the goat cheese. Since the water bath was coming down from over 100 degrees, and the milk coming up to try to reach 87, I set it in right away. After 45 minutes, the milk was getting close to 87, but the bath was still over 100, so I dropped in some ice cubes and voila. The happy medium occurred and I hit 87. Dropped the sous vide temp, dropped in more ice cubes to bring it down, and then added the chevre starter. I THINK this may be where things went awry...?

I don't buy cookbooks, because most everything you want to make has free recipes online. Cheesemaking is no exception...except! Lots of people using lots of different methods and different products, all which require subtly different treatment of the materials at hand. So I had a chevre starter which didn't require rennet or extra citric acid, but doing searches for "goat cheese home made with starter" and similar, I was getting a lot of people who had different starters, or combinations of starters. Looking without the starter or culture in the search terms, I got the same farmer cheese methods as the queso blanco, with lemon or vinegar to trigger a curdle, which supposedly has less flavorful results. Only a couple had done theirs with a chevre starter, but none mentioned the brand, so I couldn't be sure it was the same. But both of them used half the volume of milk the packet was to cover, so they used half the starter. That seemed logical and I did the same, erring on the side of more starter.

I set it to go for the night, watched some television, and went to bed, expecting a "goat yogurt consistency" by morning. 13 hours later...it was very very thin. Some culturing (is that a verb?) had occurred, but it seemed like a watered-down yogurt at best. But looking at videos, other people's results were from a regular yogurt to a thicker custard consistency. I tried to find ways to fix it, but none of the recommendations had any insight for me other than "next time", including one site I found that I hadn't the day before saying using less than a packet of starter, even if you use less milk, will cause it to fail. So perhaps my culture was more like the one in that company's line, and I should have used the whole packet? I don't know. But as soon as I started spooning out the "curds" it was dissolving into slippery milk. It wasn't holding.

I tried pouring it through a cheesecloth, and it was thickened enough that it wouldn't go through without squeezing, but it was not whey coming out but plenty of the fats as well that hadn't properly cultured/curdled. I tried adding some lemon juice to see if it would curdle further, but it didn't do a thing.

I gently squeezed a while, getting goat milk all over the inside of my sink as it squeezed out of any ready hole in the cheesecloth. I got it down to about half volume and decided to string it up and hang for the morning anyway, to see what comes of it. Probably I will just have a pot filled with milk and a limp wet cheesecloth, but we'll see in a few hours...

So ultimately? I don't think the sous vide is necessary. Even the goat cheese, which could be held at precisely 73 degrees, most people just set the pot on a counter with a towel over it and the residual heat, while sitting at room temperature, does the trick. So the water, power, and effort to set up/teat down sous vide for that seems unnecessary.

Sadly, the non-homogenized organic local goat milk cost me $10 for a 1/2 gallon, so I am not just running out to the store to try again when I can get really delicious local, organic, farmstead cheese sold to me in a neat package at my store for less. I will try again sometime, but at that price point, I am not sure the result will be "roll my eyes back in my head so worth it" kind of cheese...?

EDITED TO ADD:
IT WORKED! My goat cheese actually turned out! I may even have had more of it if I hadn't so aggressively squeezed the cheesecloth at the outset. I let it hang out for most of the day yesterday and then turned it out of the cheesecloth into a small ramekin before I went to teach, leaving what looked for all the world like a tiny scoop of ice cream (photo left). It was still quite wet and not as dense as I would like, and I wasn't certain it was "turning out". I covered it and put it in the fridge overnight. And today? The texture is sooo smooth, earthy flavor, a hint of the lemon I added at the end of the process to try and get the curd to solidify better. I have salted it with some kosher salt, stirred, and stored it to have later with some crostini!

Here is the video from Sous Vide Everything, for those interested

Stupid Simple Instant Pot Mac n' Cheese

by Sunday, January 21, 2018

I think it's safe to say that if it involves cheese, I'm into it. What is "it"? Anything, so long as "it" involves cheese, of course.

I also am a big fan of pasta, and lately you may have noticed I am into experimenting with my Instant Pot. So a marriage of cheese, pasta, and my IP is pretty much heaven-sent. And all I can say is RUN, don't walk, to get the ingredients to try your very own version, stat. Because it is STUPID simple and STUPID fast. How does prepped and cooked in under 15 minutes grab you? Yes, that includes mis en place, coming to pressure, cooking, releasing, and plating. Bonus: truly only one-pot will be dirty when you're done (well, and your plates and utensils... stop being so picky).

I have included lots of suggested variations, which in some cases would lengthen your cook time, but many are ingredients you can finish prepping while the IP is doing it's thing so it adds no additional time. Even then, it's gonna be fast and it's gonna be delicious. For me, the pasta was perfectly al dente--to the tooth! Unlike the box mac n' cheese that often comes out mushy/too soft for my taste, this had the mild chew of a perfectly done pasta. Prefer it softer? You can easily let the pasta sit for a minute before releasing pressure to add a little extra cook time, or simply sauté a minute, lid off, until you get the texture you prefer.

Some bloggers make big claims about this being a "blue box but better" experience. First of all, why would I want that? I don't think anything compares to the powdered neon yellow-orange of the mac n' cheese so many of us grew up with, and if that is what I am craving, that is what I am making. But if that's what you're going for, stick to American cheese in your version, as nothing else will really compare otherwise. For me? I wanted home made mac n' cheese with ingredients I can stand by, and fast as fast can be. Done! Now I'm kinda obsessed with all the different ways I can riff on this recipe, the sum of this mental roller coaster is outlined below:

INGREDIENTS
FIRST
1 lb bag of elbow macaroni
4 Tbsp butter
4 cups water
2 tsp ground mustard
salt and pepper

THEN
1 cup heavy cream, evaporated milk, or even 3/4 cup whole milk and 1/4 cup half-and-half (consistency will vary, but any will work)
16oz shredded cheese of choice
      - I used pre-shredded cheese for speed: 8oz of sharp cheddar and 8 oz of a mixed Mexican blend we had on hand with Monterey Jack, Oaxaca and Asadero
OPTIONAL: 1 cup cream cheese

DIRECTIONS
  1. Dump macaroni, butter, water, mustard, salt and pepper into the IP and stir together. Close, set to high for 4 minutes. 
  2. Quick release and stir to make sure noodles are cooked to your liking. If not, you can sauté a minute to boil it a little longer, but mine was perfect.
  3. Stir in the rest of the ingredients, AKA TEH NOMS. All the creamy goodness and cheeses melt together.
  4. That's it. Really. All done. Serve it and eat it. Voila. Finis.
Okay, so if you want to take this a step further, you could casserole it. Spray a 9X11 pan with Pam, load in your mac n' cheese. Sprinkle some more cheese and some breadcrumbs over the top and broil in the oven until melty and browned on top.

VARIATIONS
The variations are simply endless. I can't stop spinning on ideas!
  • Stir in spinach or broccoli, peas, artichokes, or other veggies of choice
  • Cube and oven-roast seasonal veggies (squash, peppers, etc) to add in final step.
  • Stir in bacon, sausage, ham, or shredded or chopped chicken from a previous meal or a pre-cooked store-bought bird
  • Hit with some garlic powder or garlic salt, cayenne, Italian blend, or any other seasoning of choice for a punch of flavor
  • Use chicken broth instead of water to cook the pasta for a little more flavor
  • Use mozzarella, gruyere, fontina, gouda, havarti, parmesan, and/or other mixed cheeses for different flavors. Smoked gouda mac n' cheese?! Yes! Blue cheese? Yes yes! Brie and camembert? Hell yes. And don't be mad, but American cheese/Velveeta is of course right up there as well.
  • Swap out the pasta for kicks. Bowties (farfalle)? Penne? Gemelli? Shells? Just about anything should work. One of my faves is orecchiette, so I want to try that next.
  • Seafood! Crab or lobster mac with chives and Old Bay? White cheddar and gruyere, asparagus, and smoked salmon, anyone?
  • Stir in pre-made pesto, top with pine nuts and parmesan, maybe even dollops of goat cheese
  • Use the Mexican blend cheese from the store, maybe add some Pepper Jack. Add black beans, corn, and chiles for a Mexican flavor. Top with avocado, cilantro, and green salsa.
MORE VARIATIONS
I love this recipe for adding sweet potato and making them into cupcake-sized mac n' cheese bites. I bet pumpkin or butternut squash would work well here, too. They can even be made ahead and frozen for later enjoyment.

This one has peaches and prosciutto! Over orecchiette, even. Now I'm thinking butternut squash and blue cheese with sage...Mmmmm

This genius over here gave me another leftover option, namely mac n' cheese quesadilla. Makes me want to make the Mexican variation I was thinking about above to start with. Should I do this, I am not ashamed to say I will devour this in a spectacularly messy fashion.

And this fancy-pants appetizer made with mac n' cheese in little prosciutto cups is up my alley.

I have to stop now. All this is making me hungry. I think I'll go have some cold leftovers to start my day...


All About Eggs in Instant Pot

by Sunday, January 14, 2018
I can sum up cooking eggs in an Instant Pot in two words: easy and frustrating!

Cooking eggs conventionally, we have boiled, baked, steamed, poached, and fried, to name a few. Among the "in the shell" methods, we call them "two-minute eggs", or whatever length of time you want them cooked to get the yolk the way you like it. Sounds easy enough.

With Instant Pot, we have different models/sizes to contend with, but we also have altitude and psi to take into account.

Altitude because the temperature of boiling water changes depending on your altitude, and pressure cookers cook with pressurized boiling (above boiling, even) steam. So if someone in Denver, Colorado is telling you to cook a recipe for 30 minutes, in Seattle you're gonna cook it for a little less time. A handy little cheat sheet lives here, if you happen to be curious.

On top of that, different models of pressure cookers operate at different psi, pounds of pressure per square inch. Stove top models and many electric models cook at 15psi on high, while inexplicably most Instant Pot models top out a little over 12psi. So the intersection of altitude and model can make differences in cook times, which you can geek out about over here, if you wanna know the ins and outs of that (and funny enough, uses the same comparison of Denver, CO in altitude adjustments that I chose to).

So what does this mean for me, an Instant Pot user at sea level? Not much for most recipes, honestly. I will be trying to make a note of online recipes and where the author is from in future, at least. But it makes a big difference when we're talking about a very short cooking window, as with eggs. Literally one minute difference, can produce runny or hardened results. Add on manual or natural release, and whether you shock the egg after to stop cooking and you have a handful of steps where the finished product can vary widely. Based on ONE MINUTE of cook time. No pressure, would-be Julia Childs (I made a punny! "No pressure, " get it?!" *ahem*)

Recently I followed a comprehensive blog post where a home cook took beautiful photos of her 1-5 minute "poached" eggs. Specifically I was looking sidelong at her images of a perfectly drippy 5 minute high-pressure egg, when I get similar results at 2 minutes in-shell. How could 5 minutes come out gooey in a silicone cup, and with no ice bath to follow? I decided to try 4 minutes and came out with just-this-side-of-hard boiled, confirming my skepticism. Which is what went me down a rabbit hole to try and suss out why her results could be so different from mine. And it turns out that while we were using the same model of IP, and I used the exact same silicone cups even, she is a few thousand feet above sea level. Could that be the difference? I am going to find out!

Next experiment is LOW pressure poached eggs, as outlined on The Kitchn when briefly discussing the purpose of low-pressure settings on our pressure cookers. Up to now, I have been doing 2 minute eggs on high pressure, followed by an ice bath. The results are a gooey yolk, which I love, but sometimes the whites don't set all the way inside which I do NOT like. So the next test will be a low pressure setting for 3 minutes with manual/quick release and see what we get. I will try to report back soon!

Some inspiring recipes I found while looking for info on my blog post:

Egg Papin - Poached Eggs in Bell Pepper Cup
Eggs En Cocotte - "French Baked Eggs"


Instant Pot Killer Cheesecake

by Sunday, January 07, 2018
I have been using my IP for a little over a year now, and so far I have only ever done savory dishes/meals. I keep running across recipes for baked goods, but they require a small springform pan to go into the IP, which I didn't have. Well, the other day I was ordering something small off of Amazon, such that it was an "add on" item and required I bring my total to over $25. I figured this was a perfect opportunity to pick up that pan I always wanted. Bonus, I also wanted a bundt pan for another recipe I wanted to try out, and this sweet little number came up in my searches-it's both! And it comes in two adorable colors: orange and turquoise! I snagged the turquoise one and it arrived the other day.


This week has been a bear, unfortunately. Hubby is sick again (still sick? Who can tell any more?!), and my studio flooded in the rain and we have spent the past several days UN-installing all my beautiful bamboo floors to chase down the trouble. Unfortunately, the water intruded far further than we could have imagined and we are having to take the ENTIRE floor up, and not just a section. Cue call to insurance, and we'll see where we land...

So yesterday, I was feeling despondent and tired and cranky and sore from lots of unhappy physical work. We were at the grocery store to get some staples when I remembered I had this little pan at home and I wanted to try my hand at making a salted caramel cheesecake. Cheesecake of all flavors happens to be one of my and my husband's favorite desserts, and I thought maybe if I had the energy left when I got home, I would bake us one to cheer us up. Ooooh, and I had some leftover Ginger Snap cookies I could make a crust with, I bet! So I tossed some extra cream cheese and sour cream in the basket.

Hubby went into shut-down mode and I set to my task. My spirits lifted a bit as I changed my focus to something fun. He walked into the kitchen, hearing the bashing about, wondering what I was up to. I commanded him to go sit down and offered to make him a hot buttered rum to soothe his throat and maybe lift his spirits as well. Which is when inspiration struck. Cheesecake. Ginger Snaps. Salted Caramel. Hot Buttered Rum. I need to put these all together!

After scouring the Googles for some versions of cheesecakes with some of the ingredients I envisioned--in order to get the ratios at least somewhat correct--I altered course slightly, and this is the result. Hubby gobbled it down, complimenting me repeatedly on success. The crust really was noms in particular. We both agreed the caramel sauce was fairly unnecessary as the cheesecake itself was so yummy, though I might add a tad more sugar to the filling next time. Hope you enjoy it!


Instant Pot Hot Buttered Rum Cheesecake with Gingersnap Crust and Salted Caramel Sauce

TOOLS
7" springform pan
parchment paper (optional)
Cooking spray
Foil
Paper towels

INGREDIENTS

Crust
~20 gingersnap cookies
4 Tbsp melted butter
2 Tbsp sugar

Filling
2 packages cream cheese (16 oz), room temp is best
1/2 cup golden brown/light brown sugar
1/4 cup sour cream
2 Tbsps rum -OR- 1 tsp rum extract (or vanilla if it's all you got)
1 Tbsp all purpose flour
1/4 tsp. ground cinnamon*
1/8 tsp ground cloves*
1/8 tsp ground nutmeg*
2 eggs
*shortcut, you can use pumpkin pie spice if you like, close enough, IMO.

Topping
I cheated and used a salted caramel sauce I already love from Delicately Sweet Confections which I got from The Handmade Showroom.
If you need to make a sauce, try this simple salted caramel sauce, or alternately this rum caramel sauce.

DIRECTIONS


The foil sling thing, in Step 8
  1. Mise en place - set out your cream cheese, sour cream, eggs, and spices for the filling right away so the cold ingredients can come to room temp and you're ready to whack out the filling when your crust is done. If you have a second silicone ring for your IP which hasn't been used for cooking meats/savory things, swap it in now so your dessert doesn't taste like last night's dinner.
  2. Prepare your springform pan. Spray inside of springform pan lightly with cooking spray. Line bottom with a circle of parchment paper, cut to fit the bottom and spray lightly again (optional, but this second step makes getting it out of the pan even easier)
  3. Make crust. Using a food processor, or the handy plastic bag and a rolling pin method, break up your gingersnap cookies until finely ground. Combine with melted butter and sugar and blend thoroughly. Using a flat bottom glass or other similar tool, press gingersnap crust into pan bottom and working half way up around the sides as well. Allow to set in freezer while you make the filling.
  4. Blend all ingredients except for the eggs in a stand or hand mixer, scraping down sides and making sure everything is blended evenly. (If you let the ingredients warm to room temperature, this should come out smoothly. If you didn't, you may get a more lumpy textured filling. I'm okay with this, but fair warning to you.) Add two eggs and blend just until combined, don't over-mix.
  5. Pour filling into prepared crust, smoothing the top
  6. Take a piece of paper towel and a piece of foil of similar shape/size, place foil on counter, then paper towel, then your cheesecake pan on top of both. Mold the foil/paper towel around the base of your pan (prevents water from getting to your crust).
  7. Take a second length of foil and loosely cover the top of your pan - this keeps water from dripping down from the lid onto your cheesecake top
  8. One more foil thing! Take a length, about 18 inches long, fold into  a 4" strip. Slip under the pan like a sling--this makes it easier to lower your pan in and lift it out when you're done.
  9. Pour 2 cups into pot and place metal trivet in the bottom. Lower your pan onto the trivet. (Tip: using boiling water and closing the IP quickly thereafter saves time coming up to pressure. Works with anything you cook this way.)
  10. Lock lid, make sure it is sealing, press "Manual" and set for 35 minutes on high pressure. Allow to release naturally.
  11. Lift out cheesecake, remove all foil and set on a cooling rack for a bit. When cooled, release from pan (use a knife around the edge to help as needed), put in refrigerator for 3-4 hours or overnight.
  12. Slice and plate with half a gingersnap cookie on top, drizzle with sauce of choice.
TIPS
Feeling impatient about that cream cheese and eggs coming to room temp? Full a bowl with warm water. Drop in eggs. Put cream cheese in a ziplock bag and submerge as well. Let sit for 10-15 minutes.

When preparing your crust, only go up the side of the pan partway. The more exposed your crust is above the filling, the more opportunity it will have to absorb moisture and come out spongey.

Do not forget to release the cheesecake from the pan before refrigerating. I got lazy and just stuck it in there, so our crust lost all crustiness, sitting in its own steam. For a crispier crust, get it outta there!

This article may contain affiliate links which support this site at no cost to you.


My Favorite Instant Pot Mashed Potatoes

by Friday, December 29, 2017
It always sounds ridiculous to say “I won’t ever do it another way again!”, but Instant Pot mashed potatoes are the best texture and flavor I have enjoyed in....I dunno how long.

There is really nothing to it, like most everything in an IP. The reason they are awesome is that they *pressure steam* instead of boil, so there is no extra water introduced to the potato watering down the flavor and texture, nor in any way breaking down the potato before you get to mashing it. If you're used to pouring cubed potatoes into a colander and watching them start to fall apart already you know what I mean. In the IP, they come out quite firm, mash up as chunky or as smooth as you want to, and the flavor is so robust. And you can let them rest as long as you want without overcooking them and/or making them gluey or mushy. So you can "hold" this dish for hours and still have an amazing result.


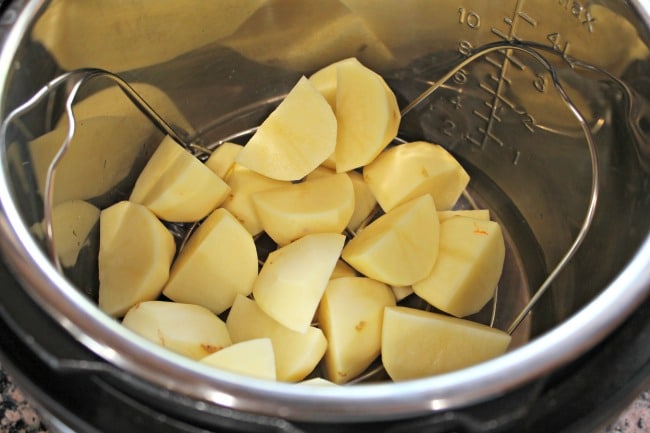
  1. Peel and quarter russet potatoes or red potatoes (not cube, quarter; and you don't even have to peel if you like skin on/chunky mash potatoes--so simple) 
  2. Put metal rack or steamer basket of choice into pot, add 1 cup water 
  3. Close, seal, and set to steam 5-8 minutes (I do more if I am making a bunch, but do 5 for a couple russets) 
  4. (really, 3a) If you are of a mind to add other flavors, like garlic, you can heat some butter in a small pot on the stove while the potatoes are busy and add some crushed garlic cloves to it. Sautee a little until garlic smells rock your face, remove cloves, add milk/cream to it to heat through. This step is not one I usually do, but sometimes is fun for a flavor boost. 
  5. Remove steamer with potatoes, place potatoes in bowl or back into dry liner (like I do) and mash along with whatever you like. I almost always do butter, cream, and salt/pepper. Sometimes I will add some sour cream, parmesan, and/or a dash of nutmeg. 


Some cool things:
* you can natural release or quick release, it has made no difference for me
* you can let them just sit in there a bit if you want to. We were in the middle of a campaign board game the other night and we left them in their unmashed state for about an hour and it still came out awesome
* I have read over and over that some people mash it all up then put it back in the liner in the pot, put the lid back on and let it sit for hours on the "warm" setting and they stay amazing. I haven't tried it, but it seems to be a thing.

BONUS - COOK AND FREEZE MASHED POTATOES
So apparently mashed potatoes (with butter/cream aka plenty of fats) hold up really well to freezing and thawing. So you can make a big ol' batch of mashed potatoes, portion them as you like, freeze, and have them at the ready all month long.
Two methods:

Method A. Cool the potatoes enough to portion them into ziplock bags, flatten the bags, and freeze in convenient stacks.

Method B. Portion them into one cup mounds/pucks, freeze on a parchment paper lined tray until hard, then toss into a ziplock bag such that you can pull out as many one-cup portions as you like when you're ready to heat them back up. So handy! And if this method appeals, you can make "party pretty" versions of these thusly:


BONUS PARTY-PRETTY OPTION - MAKE-AHEAD DUCHESS POTATOES
If you want to make Duchess Potatoes--which is how I discovered IP made the best potatoes--make sure you use cream and add 2-3 egg yolks to your mash stage, depending on the volume of potatoes you are making.

Using a spoon or fancy-pants frosting piping bag, make mounds of potatoes on a parchment-paper lined baking sheet.

Freeze and then toss frozen potato mounds into a ziplock bag to store.

When ready to cook, place desired number of potato mounds onto lightly greased baking sheet, brush with water/egg wash (some people use butter, but it can burn at high temps), and bake in a 375 degree oven for 20 minutes or until golden brown and warmed through.

If you want to bake them the day you made them, just give them a little time in the fridge to firm up, then brush and bake.

Instant Pot Pressure Cooker Iced tea

by Sunday, May 21, 2017
Makes 1 gallon

INGREDIENTS
  • 10 tea bags (remove tags and tie stings together for easy removal)
  • 8 cups water
  • (1 cup of sugar for sweet, or less to taste)
INSTRUCTIONS
  1. Place all ingredients in pressure cooker pot.
  2. Lock the lid lid and set valve to sealing.
  3. Press the manual button, set to high pressure for 4 minutes.
  4. When done, quick release pressure with a set of kitchen tongs.
  5. Stir well if you added sugar.
  6. Remove tea bags with tongs.
  7. Place 8 more cups of cold water/ice in a 1 gallon pitcher and then add brewed tea.
I made mine with my daily-drinker, Yorkshire Gold tea, which has no strings. I just used a slotted spoon to remove them, pressing another spoon on them to press out any retained water in the bag itself. I also love making tea with different flavored teas, like using Earl Grey, or an herbed tea, etc I saw one recipe call for putting some peeled slices of two apples in before pressure cookin', which would be a great natural sweetener. I could see that with a little cinnamon and lemon for a unique iced tea experience, or substitute different natural fruits such as mango or peaches!

Chocolate Marshmallow Bark

by Wednesday, December 07, 2016
The basis of this recipe is actually a Weight Watchers recipe I got a loooong time ago. I riffed on it and made my own version, which I make just about every single Christmas season because it's so damn good, and even more damn simple!

Chocolate Marshmallow Bark
Yields 12 servings (or more if you cut 'em smaller like we do)

Ingredients

2-10 oz. packages Ghiradelli 60% Cocao bittersweet chocolate ( or chocolate chips of choice)
1 Tbsp butter
1-10oz package mini marshmallows (6 cups)
1-5oz. package Craisins dried cranberries (~3/4 cup)
Sprinkling of shredded coconut if desired
You can also add nuts, substitute other dried fruit, crispy cereal or oats, crumbled cookies, etc as you like. This is very versatile!

Instructions

Line a 9- X 9-inch pan with heavy-duty aluminum foil.
Place chocolate and butter in a microwave-safe measuring bowl and microwave at HIGH 2 minutes or until chocolate melts, stirring every 15-20 seconds. Stir in the marshmallows & dried cranberries.
Scrape the chocolate mixture into the prepared pan using a silicon spatula; smooth into a somewhat even layer.
Sprinkle with a light dusting of shredded coconut if desired. 
Cover and refrigerate until the chocolate sets, at least 1 hour and then keep refrigerated until ready to eat.
Cut into 12 pieces and serve.

Original WW Notes:
Nutritional Estimates Per Serving: 117 calories, 7.9 g fat, 12.9 g carbs, 1.5 g fiber, 1 g protein and 3 Weight Watchers PointsPlus value

Crab Fettucine

by Monday, January 04, 2016
1 Dungeness crab, cooked, cleaned, meat carefully removed
2 servings fettuccine, cooked
2 Tbsp butter
1 shallot, small dice
2 garlic cloves, minced
3/4 cup heavy cream
1/4 cup white wine
1/2 cup Parmesan cheese, finely grated
Old Bay seasoning
salt
pepper
fresh basil, chiffonade


Melt butter over medium heat

Sweat shallots, then add garlic and cook a minute or two

Add cream, keep over medium/medium-high heat and reduce 3-5 minutes.

Toss in white wine and continue to reduce 3-5 more minutes. Toss in most of cheese, reserving some for sprinkling on top later.

Add seasonings to your liking, add basil chiffonade, reserving a little back for garnish, and stir through.

Stir in crab, reserving a fry leg or two for garnish. Heat through

Toss with pasta. Split between plates. Stack reserved crab, sprinkle with reserved Parmesan, top with sprinkling of reserved basil chiffonade.


Double Chicken Stock / Poultry Stock

by Wednesday, December 09, 2015
You could do this with just chicken and call it "chicken stock", but I had a large turkey this year for Thanksgiving, which means lots of awesome turkey bones and bits and bobs, but I also have a freezer bag full of chicken parts from the past couple months which I wanted to make use of. So it's a mix of turkey and chicken parts for the first stage.

I think the magic in getting my lovely gelatinous results this time had to do with the meat-to-water ratio. I think I just was adding too much water in the past. I have since heard the suggestion in multiple places to make sure you have a quart of water per pound of poultry. So for a typical 10 quart stock pot, keep that in mind, and load it up well with the poultry and then add water around it only as much as necessary. As it boils off, you can add hot water from an electric kettle to keep everything under water without diluting it too much further. The meat and veggies themselves release moisture as they release flavor, and we are keeping this at a very very bare simmer rather than a boil, so we're not losing a ton of volume of liquids throughout the process to evaporation in my experience.

Some people do this in a crock pot with a cover on it, which is an option as well. It keeps a nice consistent temp, and with the lid it limits evaporation. 10 hours on low if that's your speed... Now on to my recent success!


Ingredients
Turkey carcass, cooked and stripped of most of the meat
Leftover cooked turkey parts (I put in wings meat and skin and all)
Uncooked turkey and chicken backs and necks (frozen and kept until being used)
1 or 2 carrots as you like, cut into big chunks
3 stalks celery, cut into big chunks
1 yellow onion, cut into big chunks (sensing a theme?) AND/OR
1 large leek, green parts and all (see note in step 2)
3-4 garlic cloves (chop roughly, or just smash--you can throw the skins in, too if you want)
A pinch of whole peppercorns
Fresh herbs of choice (I had thyme and marjoram from my garden)

  1. Throw poultry parts in to a big stock pot and cover with water. Set over high heat to start to boil.
  2. Meanwhile, chop all veggies, throwing them in as you finish.  For leek, slice down center and pry apart to rinse well, then (you guessed it) cut into big chunks. Toss in herbs. Add more water to cover if needed.
  3. When water begins to boil, turn down to medium-low or low, so you have the barest simmer. You don't want to agitate the ingredients any more than necessary. Just a teensy bit of bubbling on the surface is needed.
  4. You can skim the scum if you like throughout the cooking process, but I never do and even The Food Lab at Serious Eats has done testing to prove it doesn't really do anything to make your stock any clearer or purer. So it's up to you. 
  5. Simmer for 6-8 hours uncovered. I start mine before lunch and sometime after dinner I do the rest of the steps. I have done it as long as 12-18 hours, with good flavorful results. You can go 24 if you want, it's not unheard of. The longer you go the more you will be sure to have extracted all the gelatin from the bones, and the flavor isn't going to escape out the back door, so don't hesitate to go as long as you like/need. 
  6. Take two fine mesh strainers, put a layer of paper towel or cheesecloth between and nest them one inside the other. With gloves to protect your hands from hot splashing, carefully pour through strainer into another large pot. Your stock will be beautifully free of random bits, creamy yellow.
  7. Here is where Alton or any professional would tell you that you must rapidly cool the broth. Never put a hot pot of anything directly into the fridge as it will warm up your fridge to potentially dangerous levels. Some people nestle their strained stock bowl/pot into a sink full of ice. Alton also takes partially filled, frozen bottles of water and drop them into the hot stock and put them in a cooler full of ice. Be grossed out if you must, but I let mine cool on the counter for a while and then put it in the fridge. It was good enough for my grandma, it's good enough for me. So far I haven't died. *fingers crossed*
  8. Move to fridge then let cool overnight. Using a spatula or thin-edged ladle or spoon, skim the fat off the surface. You can reserve this for other cooking purposes (freeze in ice cube trays, then melt over rice dishes, pastas, etc for a punch of creamy fatty chickeny goodness)
At this point I had a delightfully gelatinous concoction. Over at the James Beard Foundation, they had a simple recipe to just poach a chicken/hen in this and then restrain, skim, cool, and store. I opted to do that, but also all the other steps all over again. So what I did was:

Double Stock Recipe
  1. Put cooled and skimmed stock back into stock pot on stove over high heat 
  2. Put a steamer basket in this and place whole 4lb chicken on it
  3. Pour in water to cover
  4. Chop all veggies as above, nestle with herbs around chicken and add any more water needed to be sure all is under water
  5. Bring to a boil, then again turn down to a bare simmer. Skim if you like as you go along
  6. 1.5-2 hours or until chicken is cooked through, lift steamer basket with chicken in it from the stock and set aside. Serve poached and hot now, or let cool until you can touch it then pull meat from bones and store for use in a future recipe.
    6b. Yes you can potentially throw these bones into a future stock. Since you cooked them for a shorter time (~2 hours), there is possibly some collagen still left to extract. Try snapping a bone. If it snaps easily it has given up all it can so just discard them. If it is still hard or bends easily, then there is more life in them bones! Freeze and save for another stock making day.
  7. Strain stock as above, cool before putting in fridge as above, skim fat, etc... and voila! A double stock to call your own!
Edited to add: if you wanna get really fancy, you can make chicken consomme, which is even MORE reduced, purified, and perfected. Here is a link directly to the James Beard recipe for taking your double stock to the next level.

PLEASE VISIT MY DANCE BLOG!


On this blog I share my personal posts about cooking and knitting, travel and other musings; while I will blog about dance-specific topics over on the Deep Roots Dance blog:
http://www.deeprootsdance.com

I hope you will enjoy both my sites. Thanks for visiting!
Powered by Blogger.