Carmelized Onion, Goat Cheese, Mushroom (optional), Thyme Quiche

by Monday, July 22, 2019
I don't have a big long story about my recipes. Mainly, I bought mushrooms to make a game night crostini recipe which I never ended up making. So I had mushrooms. And we almost always have goat cheese, but we happened to just pick up a fresh 4 oz. log of our favorite goat cheese. And I have been on a quiche kick lately, trying to figure out if this girl can figure out how to bake sometime before she's 80. (So far, so so).

Thusly I cast about for quiche recipes using similar recipes, and here's my hybrid attempt from various reputable sources. Jury's still out on the crust success, but the fillings...uh muh guh.

This is NOT one of my quick quiche recipes. Knowing that the ingredients I wanted take time, and adding a blind bake to the quiche doubles the baking time over my quick quiche, I made the ingredients largely ahead and then assembled them today, on my almost-first day of vacation (we leave tomorrow, but I have work off today for trip planning and packing).

INGREDIENTS

FOR CRUST (Pâte Brisée)
1 cup (8oz) bread flour
8 oz  butter cubed and chilled
1/2 tsp Salt

FOR FILLING
6-8 oz mushrooms of choice (I used a chef's mix)
1 large yellow onion
4 oz goat cheese
4 eggs
1/2 cup milk
1/2 cup heavy cream
salt, pepper, thyme to taste


DIRECTIONS

Make ahead - 30-45 minutes
Caramelize Onions
Sautee Mushrooms
Pie Crust (double batch then freeze or refrigerate until ready to use)

Day of - 1 hour + 15 minutes to set/cool
Blind bake crust
Prep egg mixture
Assemble and bake quiche


Caramelize Onions
There is NO SHORTCUT to really good caramelized onions. Anyone who tells you it takes 15-20 minutes is a big. fat. liar. You need to cook these babies low and slow, 45 minutes to an hour minimum; more if you want the insane gooey chutney type onions. I just wanted a good light brown, sugary caramelization, so the whole process took about an hour.

  1. Slice large onion in half, slice ends off, then working long-ways (knife should be parallel along the line from the root to stem), slice into 1/4 slices. 
  2. Melt 3 Tbsp butter over medium heat 
  3. Add sliced onions and cook stirring frequently well coated in butter and translucent
  4. Lower heat to low/medium low and stir ever 5-8 minutes, checking to make sure nothing is burning. Remove any burned bits and adjust heat. Cook until you get the desired look and flavor. For this recipe it was a light brown with still some white in there. I want them a little bit toothy still for the quiche and not just mush.
  5. Let cool to room temp then store until ready to use.
Sautee Mushrooms in butter and a little salt.

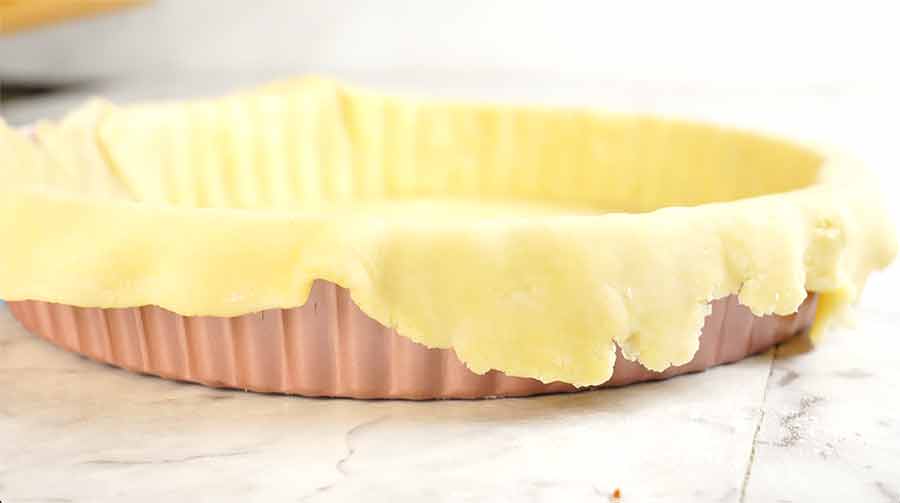
Make crust (recipe for pate brisee), divide into two balls and wrap in plastic wrap.

Let all cool in fridge until ready to use.

DAY OF
Roll out one of the two crusts and blind bake your pie crust.
Combine milk, cream, thyme, and eggs. Season with salt and pepper. Beat until a bit fluffy.
Distribute mushrooms and onion over bottom of pie crust. Put dollops of goat cheese all over. Then pour egg mixture over the top.
Bake at 375 for 45 minutes or so. Remove and let cool on counter for 10 minutes.

I wish this were my beauty, but it DID taste good.


Missing Whole30??

by Monday, July 22, 2019
Just look at the scandalous dollop of sour cream! Sassy!
While I don't miss all the work, I definitely miss how I ate on Whole30. The food was really good, and I was eating three solid meals a day. So today I am trying to resolve to re-adopt some of the behaviors I had on Whole30, like better food prep so I don't just reach for bread or a wedge of cheese when I am ravenously hungry, and making sure I have some easy breakfast options at-the-ready. The good news is, I don't have to be "compliant".

Last night I made my favorite recipe from Whole30: egg roll in a bowl. It makes enough for dinner and a lunch and is so damn tasty. I made it with the "compliant" chili sauce I prefer over Sriracha, but I could--*gasp*-- use store bought mayo instead of my own for the sauce.

This morning I made myself some chia seed pudding for the week to go with my granola and fresh summer berries. And I added cinnamon, vanilla extract and a teaspoon of honey! *pearl clutch* SAY IT AIN'T SO!

I have already done some meal prep recently when QFC had giant bone-in pork shoulders on sale BOGO. I cooked up about 10 lbs of spicy pulled pork and portioned them for meals--I kept the flavoring fairly neutral, so they can be seasoned for different cuisines. I can actually make pulled pork and veg bowls with RICE if I want. So rebel. Much anarchist.

I want to keep this trend going a bit and see what more habits I can adopt. Chris has said he would be into doing Whole30 again, or adopting a modified Whole30 as a lifestyle. I say great, if he helps a bit more with the meal planning (he did a BUNCH of cooking during Whole30, but mostly it was my leg work on assembling the menu plans, which was a bit tiring for 45 days straight).

Super Fast Easy Quiche Crust

by Monday, May 27, 2019
I am terrible at baked goods in general, so it is unsurprising that I avoid crust recipes of any kind. I often keep a Pilsbury fridge crust on hand for when I want to make something with a crust. So I was very happy to find this recipe to be very quick to put together, and allowed me to make a quiche on the fly this morning. I am adding the changes I made to it to make it work for me.

INGREDIENTS
  • 1 cup flour
  • 1⁄2 teaspoon salt
  • 1⁄4 cup olive oil or 1/4 cup canola oil (or possibly 1/2-1/2 oil and butter)
  • 1⁄4 cup ice water (my fridge door water was cold enough)
DIRECTIONS

  1. Mix flour and salt with fork. Optionally add some herbs, like dried rosemary, oregano, and/or thyme to the dry ingredients. (Could I add sugar and vanilla for a sweet crust? I think so!)
  2. Beat oil and water with whisk or fork to emulsify
  3. Add oil/water into flour and mix with fork.
  4. Press into 9" pie crust, trying to keep the thickness even as possible.
  5. Pre-bake/blind bake for 5-7 minutes to crisp up
  6. Fill with quiche mixture of choice and bake at 400F until done.

While we're here, this is the quiche recipe I made:

INGREDIENTS
  • 5 large eggs
  • 3⁄4 cup milk or cream
  • 3⁄4 teaspoon salt
  • 1⁄4 teaspoon black pepper
  • 1 cup cooked ham cubes (store-bought cubes for pizza toppings)
  • 1 1⁄2 cups shredded cheese divided (I used 1 cup cheddar, 1/2 cup mozarella)
  • 3 tablespoons green onions (I used chives from my garden)
DIRECTIONS

  1. Preheat oven to 400 degrees F.
  2. Prepare pie crust in a 9" pie plate, crimping the top edges if desired.
  3. Blind-bake crust for 5 minutes if you would like to
  4. In a large bowl, whisk together eggs, milk, salt and pepper.
  5. Sprinkle ham, 1 cup of cheese, and green onions into the pie crust and pour the egg mixture over top. Sprinkle remaining 1/2 cup cheese on top of egg mixture.
  6. Bake for 35-40 minutes until the center is completely set. Let cool for 5-10 minutes before slicing and serving.

Teaching Board Games

by Friday, May 03, 2019
A typical game night at our house. Game pictured: Valeria Card Kingdoms
Some of my favorite blog posts come out of excellent questions and discussions on Board Game Geek on Facebook. Today was no exception as I sipped my tea this morning and read a thread on how people approach teaching board games to groups. A gentleman on the group is planning on teaching people how to teach games at their local library, which is brilliant! Here is my response:

My process before bringing a game to teach to a group:
  1. Read rules myself, punch cardboard and prep game storage as needed
  2. Watch video tutorials or playthroughs if I need supplemental learning
  3. Play game by myself or with a close friend or partner to get the flow and better understand the system
  4. Day-of, decide if showing them a tutorial or teaching it all myself is the best way to approach it.
  5. Before teaching/showing rules video, give them the "flavor spiel"--aka the story behind the game, our goals/win conditions, and/or anything to convey the feel and concept of the game in a fun way.
  6. Rules-portion of the evening, either me or video
  7. Answer questions, maybe demonstrate a practice round if it makes sense to do so.
  8. If particularly complicated, it may be helpful to play a few learning rounds with everyone taking a turn "open hand"--that is, with any hidden information, goals, cards, etc open to discuss the flow of the turn and the round.
  9. Set up and play the game.
  • Bonus tip: giving people something to do during set-up keeps them engaged and interested, and helps them get to know the components you will be teaching them about. For instance, take the simple game of Azul. I will give the player boards to one person and ask them to pass them around to everyone, colored-side-up, along with a black cube marker. I will have someone else distribute the market "coasters", removing however many we need to for our player count. I will have someone else in charge of the tile bag and setting out the initial tiles. This is an engaging, tactile way to include everyone instead of them sitting there watching you do everything. Gets them excited before they even begin.

Savory Meat Hand Pies

by Friday, April 26, 2019
I have never been a meat-in-pastry fan. But like many things I thought I didn't like, it's about finding the right recipe and preparation to turn you into a convert. My meat pie gateway was turkey pot pie I made with Thanksgiving leftovers, which I further refined the next year based on my resdient pot-pie-lovin'-husband's requests.

Empanadas and hand pies fall into the same category. I have some good ones, but nothing I would order off a menu. But Chris sure loves meat pies, and in searching about for good hearty quick bites for a game night we were hosting, I decided to surprise him and concoct a hand pie recipe I thought even I might like. Even wilder? I USED LAMB. I never use lamb. I used to hate lamb. Now I find that when in a meat blend--like a meatball or meatloaf--it can be that subtle *something* you can't quite put your finger on. The mouthfeel changes; there is a flavor there that beef or sausage doesn't impart, alone or together. So I decided to include it in my recipe. And since I was using lamb, I decided to pop some cinnamon in there as well.

I am in love with my recipe. And I didn't write it all down when I made it! I could cry. So here is my attempt to write down what I remember, and when I make it again, I will come back and edit as needed.

Note: this makes a LOT of little pies. By my count, this entire batch would make about 80+ pies depending on how thin you roll your dough out. I made the entire recipe, then divided them out in rough thirds, using one immediately and freezing the other two. Making them in batches, this most recent batch made 26 pies and there was some filling left over for maybe a half dozen more. Sorry I am not more precise than that!

There are two opportunities to make these ahead. The first is to make the meat mixture, portion and store until you want to continue to the pie making stage. The second is to fill and prep the pies and hold them until you intend to bake them. I have marked each optional hold step with HOLD below.

INGREDIENTS

  • 1 lb lean ground beef (I used wagyu, 11%)
  • 1 lb ground sausage
  • 1 lb lamb
  • 2 cups low sodium chicken stock (used home made)
  • 1 medium onion, finely diced
  • 5 cloves garlic, minced
  • 8-10oz mushroom of choice, finely dice (I used cremini)
  • 2 Tbsp cumin
  • 2 Tbsp thyme
  • 1 Tbsp cinnamon
  • salt and pepper to taste
  • 2 Tbsp flour (for thickening)
  • 1 package of prepared pie crust PER BATCH (3-4 packages total)
  • 1 egg white, mixed with 1 Tbsp water PER BATCH

INSTRUCTIONS

PREP MEAT MIXTURE
  1. In a Dutch oven over medium heat, add all meat and cook, rendering fat until most of all pink is gone. Drain out most of the fat, leaving just enough to keep meat from sticking, and continue browning until a fond (layer of browning) builds up in the bottom. Deglaze pan with a cup of the chicken stock, scraping up all the brown bits as best you can. Transfer browned meat to a bowl and set aside.
  2. Add onion and garlic to the pan, season with a couple pinches of salt, and cook until translucent. If you need to use a little oil to keep things from burning, do so as needed. Remove onion and garlic to the bowl with the meat.
  3. Add mushrooms to the pan and cook over low heat until they are softened and a little glossy, releasing a little of their moisture and shrinking in size a bit. Add meat mixture, all spices, and the other cup of stock. Cook over medium to medium-hight heat, stirring frequently and reducing and thickening the mixture, about 5 minutes. Salt and pepper to taste. Add the flour are stir in thoroughly then remove from heat.
  4. HOLD!
At this point you can portion out  and label meat for storage, allowing to cool in the fridge before putting in the freezer. To use later, simply defrost the mixture in fridge before using. If you want to make any or all now, make sure your filling is thickened and not too hot, so you don't just melt right through your pie crust as you're filling them. Room temp is ideal. When you're ready, proceed to next step.

PREP THE PIES
This is the outline for a single batch; simply repeat for additional batches. 
  1. Line two baking sheets with foil.
  2. Prepare a surface with some all purpose flour and roll out one of the crusts to desired thickness. I roll mine until JUST before being transparent. Any thinner and they will tear, any thicker and they tend to overpower the filling.
  3. Using a 4" circle pastry cutter, cut out disks from the dough and set aside. (I used a small round twist n' loc Ziplock container for mine. You can use a small bowl or whatever is on hand, tracing the edge with a knife). When you run out of space to cut more, ball up remaining dough and roll it out to make more until you run out of dough. Repeat with second crust.
  4. Working on a clean surface, lay out a single round and spoon a heaping tablespoon of the meat mixture into the middle of the round. Don't overfill or you will get exploding pies. They should be plump, but not tearing open from the stress of the filling. Brush edge with a small amount of egg white mixture, lift and gently press edged together. 
  5. Use the tines of a fork to seal edges, or whatever pretty method of sealing edges you prefer. Place pies about 1 inch apart on the foil lined baking sheets. Using scissors or a knife, make one or two small vents in the top of each pie.
  6. HOLD!
At this point you can refrigerate or freeze your hand pies. To refrigerate, cover baking sheets with plastic wrap and hold for up to 48 hours before baking. Any longer and the pastry tends to dry out and it won't bake up as well. If freezing, freeze individually on baking sheets first, then transfer to a bag or other container. This will keep them from sticking together during the initial freezing step. They will keep well up to 3 months. You can bake straight from the freezer, but add 5-10 more minutes to your cook time.

COOK THE PIES
You can cook as many or as few of these pies as you like. We cook up two per person for a quick lunch or snack. We will cook up two to three per person to pair with some sides (mashed potatoes!) for dinner.
  1. Preheat your oven to 400 degrees
  2. If you are baking from frozen, prep a baking sheet by lining it with foil. If cooking right away or from the fridge, remove plastic wrap from your already-prepped baking sheet full of pies and you're good to go.
  3. Brush the tops if each pie with a little egg white/water mixture
  4. Bake for 12-15 minutes or until tops are golden and glossy. Remove from oven and let cool for 5 minutes or so before serving.
  5. DONE!
Baked pies can also be frozen for simple reheating later. As with unbaked hand pies, freeze individually on a tray and then put in another bag or container for longer term storage to keep them from sticking together.

Variation options:
  • Add some veggies to the meat mixture, like peas or chopped carrots.
  • Substitute the pie crust for puff pastry, simply adjust cooking times and temps according to your puff pastry instructions.
  • Add or subtract different meats for varying flavors. Beef and bacon is a popular option on the interwebs.
  • Some recipes call for fruit in them, making for interesting flavor options, such as minced fig, dates, or raisins with a higher ratio of lamb for a Mediterranean spin. Maybe some diced apple and a higher ratio of sausage. Lots of options to play with here.
  • Play with umami flavors by substituting some of the chicken stock with Worcestershire, fish, or soy sauce. Use beef stock instead of chicken stock for a beefier flavor.
  • In Australia, beef-based hand pies are known as "party pies", and are often dipped in ketchup. Some sort of dipping sauce that suits your meat filling sounds like a great option!


PLEASE VISIT MY DANCE BLOG!


On this blog I share my personal posts about cooking and knitting, travel and other musings; while I will blog about dance-specific topics over on the Deep Roots Dance blog:
http://www.deeprootsdance.com

I hope you will enjoy both my sites. Thanks for visiting!
Powered by Blogger.